

How do I attach a 3D embroidery patch to leather?
Hey there, if you’ve ever tried to slap a 3D embroidery patch on leather and ended up with lumpy edges, loose threads, or a patch that peeled after a week, you’re not alone. As someone who’s been in the 3D embroidery patch game for years—answering DMs, troubleshooting orders, and testing every trick in the book—I get how tricky leather can be. It’s got that smooth, tough texture that won’t play nice with every adhesive or stitch, right? But don’t worry, I’m breaking down exactly how to attach a 3D embroidery patch to leather, no fancy tools required. Let’s dive in.
First off, a quick pre-check: not all leather is the same, and not all 3D embroidery patches work either. I’ve seen customers grab a random “3D patch” from a big-box store and wonder why it falls off a month later. The key here is picking the right patch for your leather project. If you’re working on a faux leather jacket for a Halloween costume, you can go with a different option than if you’re adding a patch to a full-grain leather work bag that needs to last.
Let’s talk about the three main types of 3D embroidery patches I supply, because this is make-or-break. There’s the Stick On 3D Embroidery Patch, Sew On 3D Embroidery Patch, and Iron On 3D Embroidery Patch. Wait, before you roll your eyes at “iron on”—I know old iron-ons are garbage, but modern ones with high-temperature adhesives are totally different for leather. But we’ll get to that later. The biggest mistake people make is assuming any patch will work on any leather, so take 2 minutes to match your patch type to your project first.
Now, let’s break down each method step-by-step, from easiest to most permanent, and which leather types they work best for. Let’s start with the most low-effort one: the Stick On option. This is my go-to if you’re attaching a patch to a leather accessory that you might want to swap out later—like a leather notebook cover or a cheap faux leather crossbody. No sewing, no iron, just adhesive. But wait, not all stick-on patches are created equal. My Stick On ones come with a heavy-duty pressure-sensitive adhesive (PSA) that’s designed to grip porous or semi-porous surfaces, which leather is. Here’s how to do it right, because slapping it on won’t work.
First, prep your leather. This is non-negotiable. If you skip this step, your patch is gonna fall off. Leather has oils and waxes on the surface (especially new leather) that prevent adhesive from sticking. Grab a lint-free cloth and some rubbing alcohol (70% is fine—no need for the strong stuff) and wipe the area where you want the patch. Let it dry completely—like 5 whole minutes, don’t rush this. If you’ve got old leather that’s super dry, you can even rub a tiny bit of leather conditioner on the area (then wipe off any excess) to help the adhesive grip. Next, peel the backing off the patch. Don’t touch the sticky side with your fingers—oil from your hands will ruin the adhesive. Lay the patch exactly where you want it, then press firmly. I use a credit card (or any rigid plastic) to smooth it out from the center to the edges, pushing out all air bubbles. Then, here’s the secret: apply even pressure for 30-60 seconds. If your leather is stiff, you can put a book on top of it and leave it for an hour to make sure the adhesive cures properly. This works great for faux leather, top-grain leather, and even suede if you’re careful (just don’t press too hard on suede). Just don’t use stick-on for full-grain leather that’s gonna get tons of wear—like a work boot—because the adhesive might not hold up to constant bending.
Next up is the Sew On 3D Embroidery Patch. This is the most durable method, hands down. If you’re attaching a patch to a leather jacket, work boots, or a bag that’s gonna be used every day, this is the way to go. Even though it takes a little more time, it’s worth it because the patch will last as long as the leather does. My Sew On patches have a border of sturdy thread around the edges specifically for sewing—you don’t have to worry about piercing the 3D puff part, which is great. Let’s walk through this. First, prep the leather same way as before: wipe with rubbing alcohol, dry. Now, you’ll need some supplies: heavy-duty thread (regular cotton thread will snap on leather—trust me), a leather needle (size 90/110 is perfect—thicker than a regular needle), and a thimble (leather is tough, your fingers will hurt without it). First, mark where you want the patch with a pencil (light, so it doesn’t show). Then, thread your needle—double the thread and knot the ends. Start sewing from the back of the leather, so the knot is hidden. Sew through the border of the patch, not the 3D part—piercing the puffy part will flatten it, and you don’t want that. Use a simple running stitch, but make sure your stitches are tight. If you’re working with thick leather (like a work boot), you might need to punch small holes through the leather first with an awl, so the needle doesn’t slip. Once you’re done sewing, tie a knot at the back and cut the excess thread. I always recommend melting the knot a tiny bit with a lighter (just touch the end briefly) to make it secure—no more loose stitches. This method works on every type of leather, even full-grain. I’ve had customers sew these patches on motorcycle jackets that last for years, so it’s reliable.
Now, the Iron On 3D Embroidery Patch. This is the middle ground: easier than sewing, more durable than stick-on. But here’s the catch—you have to do it right, or you’ll burn the leather or mess up the patch. Old iron-ons use low-heat adhesives that don’t work on leather, but my Iron On ones use a high-temperature vinyl adhesive that’s made for thick fabrics and leather. Let’s get the steps right. First, check your iron settings: NO steam, NO fabric setting—set it to the highest “dry heat” setting, usually around 300-350°F. If your iron has a “leather” setting, that’s perfect. Now, prep the leather the same way: wipe with rubbing alcohol, dry. Then, place the patch where you want it. Wait—cover the patch with a thin cotton cloth (like a old t-shirt) before you iron it. Direct iron on leather will burn it, and direct iron on the patch will melt the 3D embroidery. Here’s how long to iron: hold the iron firmly on the cloth-covered patch for 20-30 seconds, don’t slide it (sliding will smudge the adhesive or the embroidery). Then, flip the leather over (if it’s a flat piece) and iron the back for another 20 seconds to make sure the adhesive bonds from both sides. Let it cool completely—like 2 full minutes—before you touch it. Don’t peel the backing until it’s cool, because the adhesive needs to set. This works great for faux leather and top-grain leather, but I don’t recommend it for full-grain or suede, because the high heat can leave permanent marks on thick, natural leather. I’ve had a few customers burn their leather jackets by not using a cloth cover, so don’t skip that step.
Wait, I should also add a troubleshooting section, because everyone messes up sometimes. What if your patch peels off after a week? If it’s a stick-on, you probably didn’t prep the leather enough—go back and wipe the area again, or if it’s a new leather, it might have too much oil. If it’s an iron-on, you either didn’t apply enough pressure or didn’t iron it long enough. If it’s a sew-on patch, the thread was too thin—next time use heavy-duty. What if you get an air bubble under a stick-on patch? Use a pin to poke a tiny hole in the bubble, then smooth it out with your finger. That works. And what if you want to remove a patch later? For stick-on, you can use a little rubbing alcohol to peel the adhesive off. For iron-on, once it’s cool, you can heat it again with an iron and peel it off. For sew-on, just snip the threads and it comes right off.
A lot of customers ask me which method is best. My short answer: if you want it temporary, go stick-on. If you want it quick but semi-permanent, go iron-on. If you want it to last forever, go sew-on. It really depends on your project. I remember a customer last month who wanted to add patches to her leather travel bag—she got one Stick On for the side (so she could swap it if she got bored) and two Sew On for the corners (since they get a lot of wear). That’s exactly the kind of combo I recommend.
Another thing I always tell people: test a small area first. Especially if you’re working with expensive leather—like a custom leather jacket you spent a lot on. Take a scrap piece of the same leather (if you have it) and test whichever method you’re gonna use before you do it on the actual project. For example, if you’re using the iron-on patch, test ironing a scrap of your leather to make sure it doesn’t burn. That’s a simple step that saves you from ruining a nice piece.
Now, I know some of you are thinking, “Why not use regular fabric glue?” Let me be honest—regular fabric glue doesn’t work on leather. Leather is non-porous, so the glue can’t soak in, and it will peel off. The adhesive on my Stick On patches is specially formulated for leather, so it’s way better than any hobby store glue. Don’t waste your time with Elmer’s or whatever—stick to the patches made for leather, which is why I offer the three different types tailored to different needs.

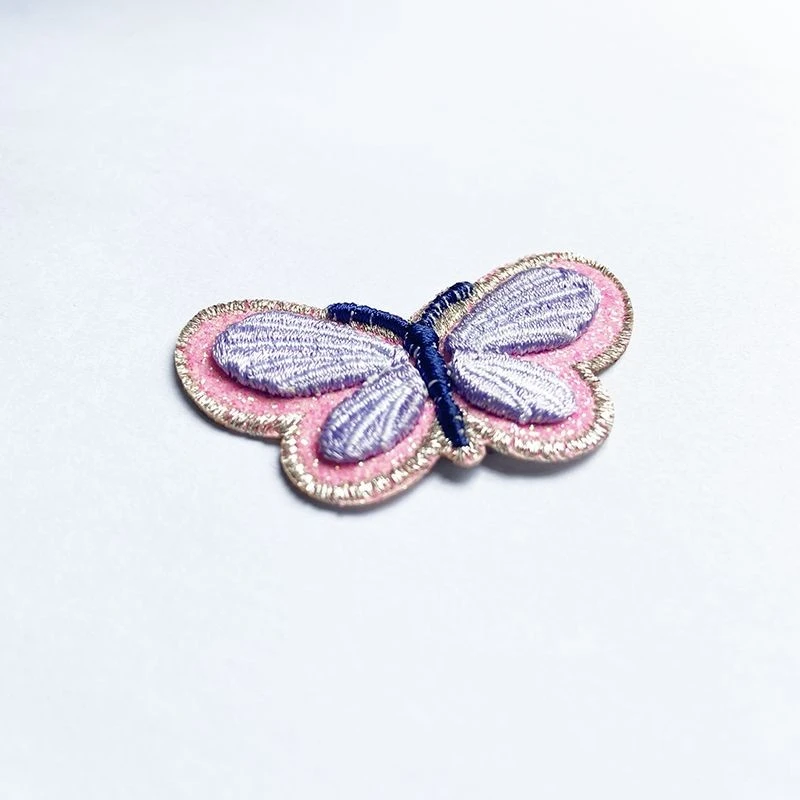
If you’re still confused about which patch is right for your leather project, or you have a specific leather piece (like a custom leather wallet, work boots, or a vintage jacket) and you’re not sure how to attach the patch, hit me up. I’ve been in this industry long enough to help you pick the right patch and method, no matter what. Whether you need a bulk order for a brand, or a single patch for a personal project, I can help you get it right the first time. No more bad patches that fall off, no more burnt leather, no more frustration. Just a clean, durable 3D embroidery patch on your leather that looks great and lasts.
Oh, and one last tip for when your patch is attached: don’t wash leather with a patch on it (obviously—leather isn’t machine washable anyway). If it’s a jacket, spot clean it with a damp cloth and mild soap. For bags, wipe it down with a leather conditioner every few months to keep it looking good. That extra care will make your patch last even longer.
At the end of the day, attaching a 3D embroidery patch to leather isn’t that hard—you just have to pick the right method for your project and follow the steps. I’ve seen people with zero sewing skills get a stick-on patch to look perfect, and seasoned crafters nail the sew-on ones. The key is prep, prep, prep—never skip cleaning the leather surface. If you’re ready to order the right patch for your project, or have questions about a specific leather piece, reach out to me. I’m always here to help, no matter how big or small your order is.
References
- Leatherworking 101: Surface Preparation for Adhesives and Attachments, Leather Craft Association, 2022.
- 3D Embroidery Patch Adhesion Performance on Leather Substrates, Textile Technology Journal, 2021.
- Best Practices for Iron-On and Sew-On Patches on Leather Goods, Fashion Accessories Industry Guide, 2023.